Magento Stack with Solr Search Engine
Highlights
Solr is highly scalable, providing distributed search and index replication.
Very fast cache backend with excellent tag support: Redis Cache & Session, Varnish Cache.
Easily and visibly mange your system in browser, powered by embedded Webmin system.
One click to install. Quick and responsive deployment.
AWS-Marketplace
Usage Instructions
Note
Before you start to access the system, please ensure the Status Checks of the instance in the AWS Console turns to 2/2 checks passed, or the initialization process might be interrupted and the software configuration fails. It takes about 5-10 mins.
Note
Please replace the instance ID with the actual instance ID of your running EC2 instance, and the public DNS your actual public DNS address.
Default Settings
Webmin / MySQL:
Username:
aurora, Password: <instance ID>
Magento :
Username:
aurora, Password: <instance ID>
Step 1 : Initial Configuration
Visit <public DNS>.
Enter your instance ID and click
Continue.(Optional) Enter the password for the
aurorauser of Webmin.(Optional) Enter the password for the
aurorauser of Mysql.(Optional) Enter your password for the
aurorauser of Magento.Click
Submitto save your initial configuration.
Step 2 : Access the System
Visit your Magento frontend
<public DNS>
Magento admin interface
<public DNS>/admin
Username: aurora, Password: <instance ID> or the one you chose
Webmin
<public DNS>:10000
Username: aurora, password: <instance ID>.
You can manage MySQL through Webmin.
Login to webmin -> Servers -> MySQL Database Server.
Username: aurora, password:<instance ID>.
How to use Solr server
If you are using a small instance type like t2.micro. The Low performance instances may lead to Solr Server Cannot Allocate Memory error. So we recommend t2.medium and the higher performance instance types.
Method 1:
Login to webmin -> Others -> Command Shell
Type the command:
//start, stop, restart
sudo /etc/init.d/slor start
Click the button
Excute command.Method 2:
There is another way to use Solr. Open a terminal or SSH client, using your Amazon EC2 SSH publiced key, SSH into the instance as the ubuntu user using the public IP information for your instance.
Type the following command:
   //start, stop, restart
$ sudo /etc/init.d/slor start
Use the Solr Admin UI:
You need to add the port
8983in yourAWS Security Groupand make it published to your IP address, then accessing the URL http://yourhostname:8983/solr/
How to Clear Redis Cache & Session
FYI.
If you are using a small instance type like t2.micro, we highly recommend you to frequently clear the cache as small instances have insufficient resources. Low performance instances may lead to a webmin crash or a mysql crash or a Cannot Allocate Memory error. So we recommend t2.medium and the higher performance instance types.
Method 1
Login to webmin -> Others -> Command Shell
Type the command:
redis-cli flushallClick the button
Execute command.
Method 2
There is another way to clear cache & session. Open a terminal or SSH client, using your Amazon EC2 SSH public key, SSH into the instance as the ubuntu user using the public IP information for your instance.
Type the following command:
$ redis-cli flushall
Cannot Access to Webmin
After the
Status Checksof the instance in AWS Console turns to2/2 checks passedcan you start to access the system, or the initialization process might be interrupted and fail.Ensure port 10000 is in your security group.
Type |
Custom TCP Rule |
Protocol |
TCP |
Port range |
10000 |
Source |
0.0.0.0/0 |
Advance Setting
Image CDN
Go to Magento admin interface, System->Configuration, Catalog->Image CDN:

When you create S3 Bucket, you need to
Edit bucket policylike this:1 2 3 4 5 6 7 8 9 10 11 12 13 14
    {
          "Version": "2016-12-04",
          "Statement": [
                  {
                          "Sid": "AddPerm",
                          "Effect": "Allow",
                          "Principal": {
                                  "AWS": "*"
                          },
                          "Action": "s3:GetObject",
                          "Resource": "arn:aws:s3:::your.bucket.name/*"
                  }
          ]
    }
Js CDN
Go to Magento admin interface, System->Configuration, Catalog->JsSkinCDNSync:
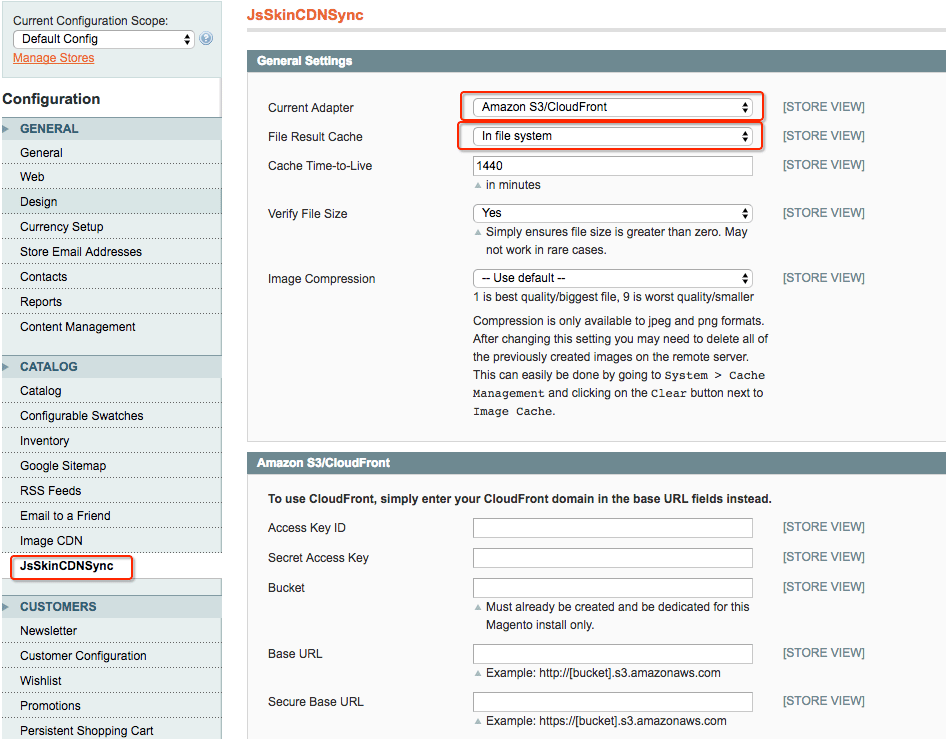
Ensure you have already created the AWS S3 bucket and the AWS CloudFront distribution related to the S3 bucket. Fill in the
Base URLand theSecure Base URLwith your CloudFront domain name: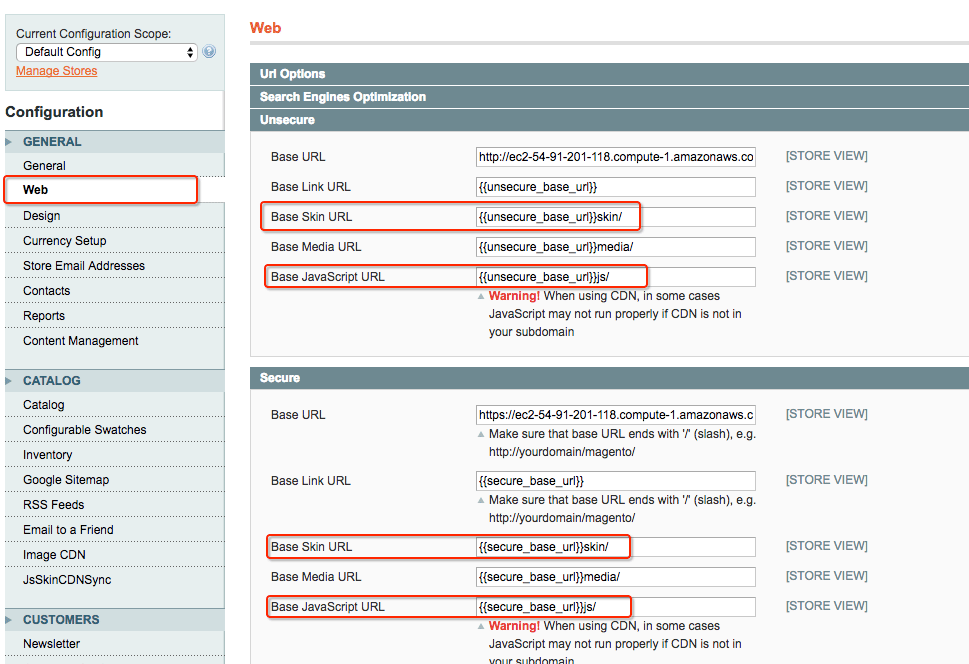
When you create S3 Bucket, you need to
Edit bucket policylike this:1 2 3 4 5 6 7 8 9 10 11 12 13 14
    {
          "Version": "2016-12-04",
          "Statement": [
                  {
                          "Sid": "AddPerm",
                          "Effect": "Allow",
                          "Principal": {
                                  "AWS": "*"
                          },
                          "Action": "s3:GetObject",
                          "Resource": "arn:aws:s3:::your.bucket.name/*"
                  }
          ]
    }
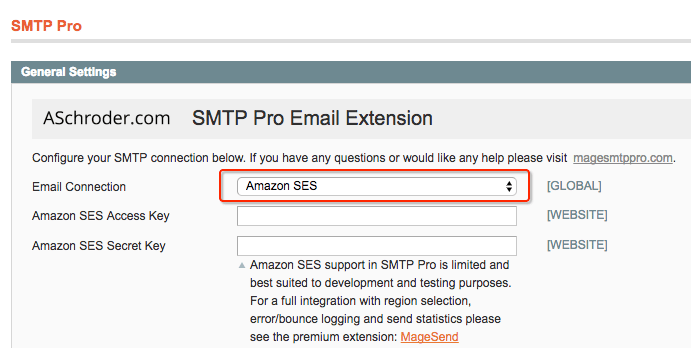
AWS SES
Amazon Simple Email Service (SES), a cost-effective email service, is a reliable, scalable way to send business email & marketing messages.
After set up the key, you have to make a verify with your store email:
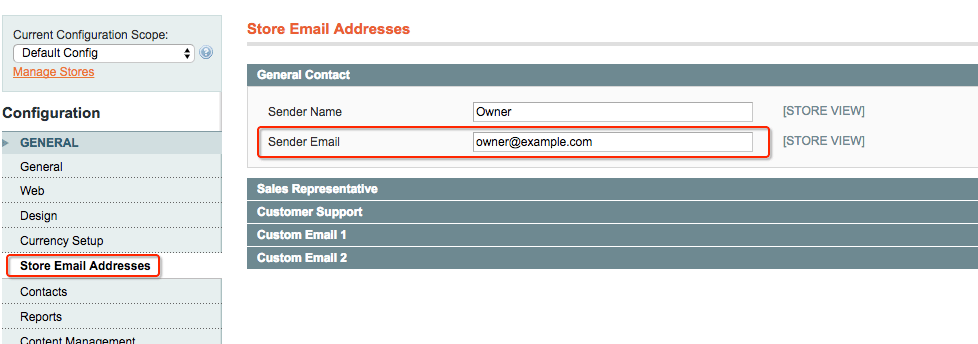
Take your eamil address to the AWS SES plane:

Final, go back to magento admin interface:
SMTP Pro,Run Self Test